Reactor-Tools 사용해보기
A set of tools to improve Project Reactor’s debugging and development experience.
reactor-tools란 Reactor 라이브러리를 사용했을 때, 디버깅과 개발을 용이하게 해주기 위한 툴이다. 얼마 전까지는 reactor-core가 아닌 별도의 프로젝트로 관리되었으나 reactor-core 3.3.0 버전에 맞춰서 reactor-core에 migration 되었고 3.3.0.RELEASE에서 릴리즈되었다.
spring-boot에서 reactor-tools를 사용하려면 spring-boot 버전을 2.2.0 이상으로 올려줘야 한다. 예시 코드에서는 spring-boot 2.2.1을 사용하였다. 예시 코드는 https://github.com/dlsrb6342/blog-sample/tree/master/reactor-tools-demo 에 올라가 있다.
reactor-tools를 활성화하는 방법은 아주 간단하다. SpringApplication이 실행되기 전에 init 해주기만 하면 된다.1
2
3
4
5
6
7
8
9
public class ReactorToolsDemoApplication {
public static void main(String[] args) {
ReactorDebugAgent.init();
SpringApplication.run(ReactorToolsDemoApplication.class, args);
}
}ReactorDebugAgent는 Call Site Info를 넣어주는 java agent이다. Runtime Cost없이 실행되기 때문에 Production에서도 사용 가능하다고 하다. reactor의 call chain을 bytecode 레벨에서 아래와 같이 바꿔준다고 한다.1
2
3
4
5
6
7
8
9# FROM
Flux.range(0, 5)
.single();
# TO
Flux flux = Flux.range(0, 5);
flux = Hooks.addCallSiteInfo(flux, "Flux.range\n foo.Bar.baz(Bar.java:21)"));
flux = flux.single();
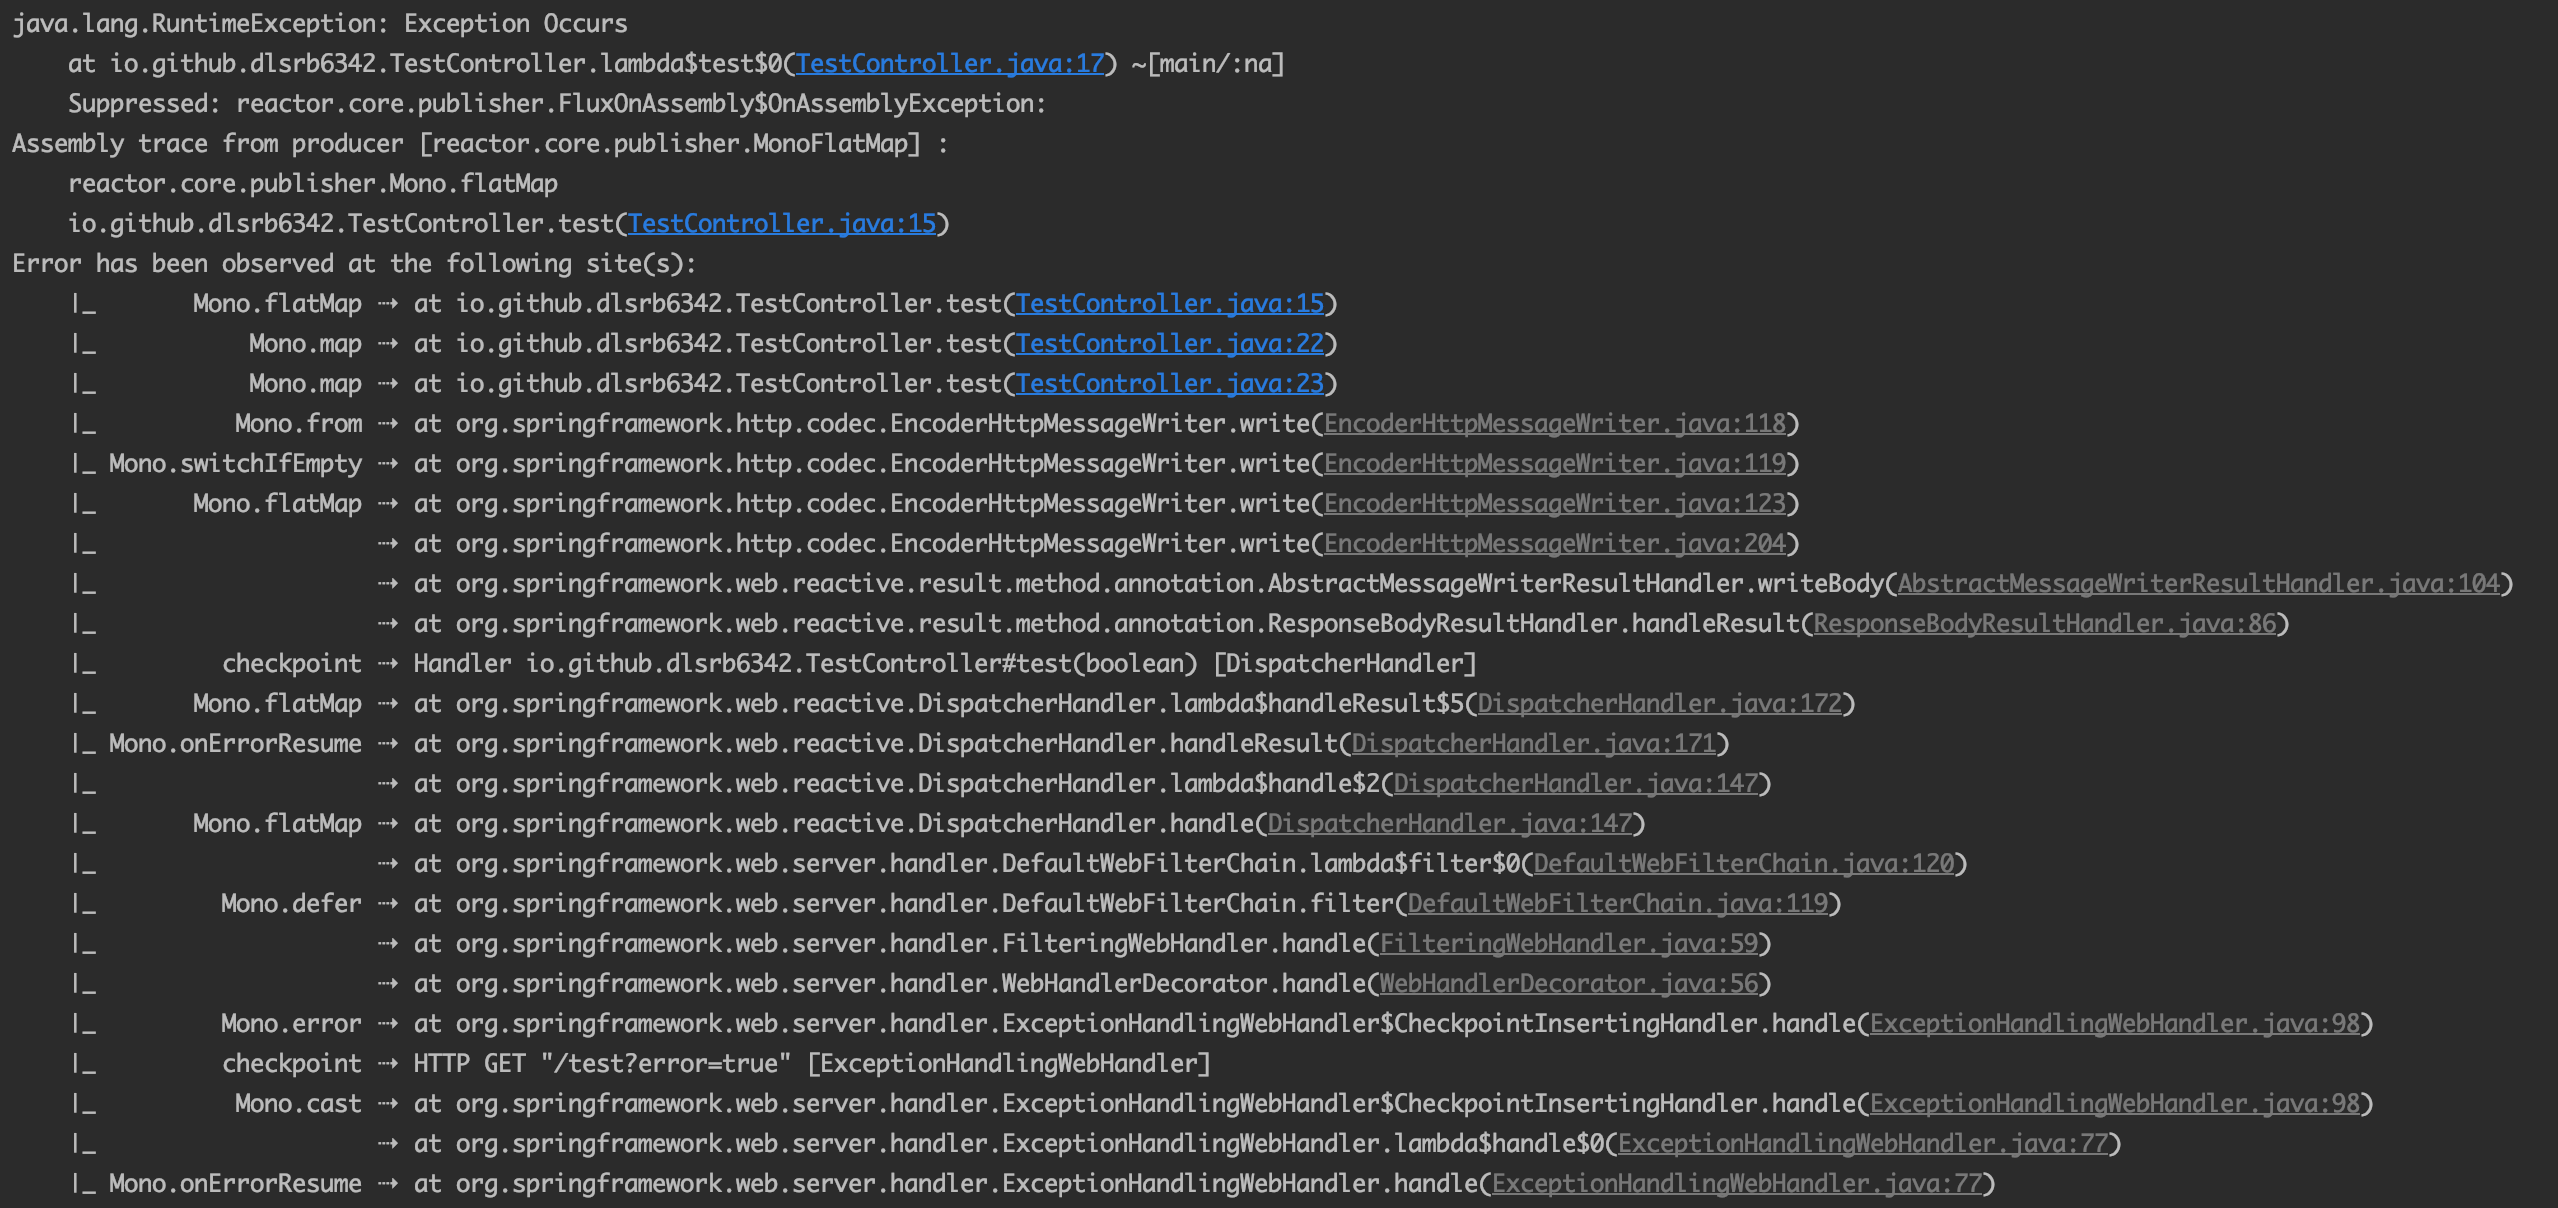
flux = Hooks.addCallSiteInfo(flux, "Flux.single\n foo.Bar.baz(Bar.java:22)"));ReactorDebugAgent를 init 해주고 나서 Exception을 발생시키면 아래와 같이 call chain을 확인해볼 수 있다. 확실히 어디서 어떤 call이 이어지면서 Exception이 발생했는지 한눈에 알 수 있었다. 물론 call chain info 밑에 Stack Trace도 출력된다.

Reactive Programming의 단점 중 하나인 Debugging이 어려운 점을 reactor-tools가 해결해줄 것으로 보인다. 또 조금만 더 기다리면 IntelliJ 2019.3에서는 Reactor에 대한 지원을 강화한다고 한다. 관련된 내용은 여기에서 확인해볼 수 있다.